In this tutorial, you will learn how to render a 2D video for your captured 3D motion. Steps featured in this tutorial are how to export the Notch motion to .bvh, how to set up your project in Blender; how to rig your avatar, how to adjust the environment and how to prepare the scene for rendering.
Step 1. Export your Notch Motion into .bvh
.bvh is a standard format that describes the 3D motion of a skeleton: it defines the skeleton structure, and the 3D orientation data of each bone, frame-by-frame. It is the description of your character motion over time. You can directly access and download the .bvh through the web visualizer:

Step 2. Set up the 3D Model in Blender
Blender is an open-source 3D animation software that can be used - among many others- to render 2D animations of 3D objects.
Download the template Blender file from your Dashboard. The template file contains the Notch 3D avatar, and it is already set up in a way that will make it easy to animate your motion: the 3D avatar uses the same bone hierarchy and naming as the .bvh exported, which is required when rigging a character.
Step 3. Import your motion file into Blender
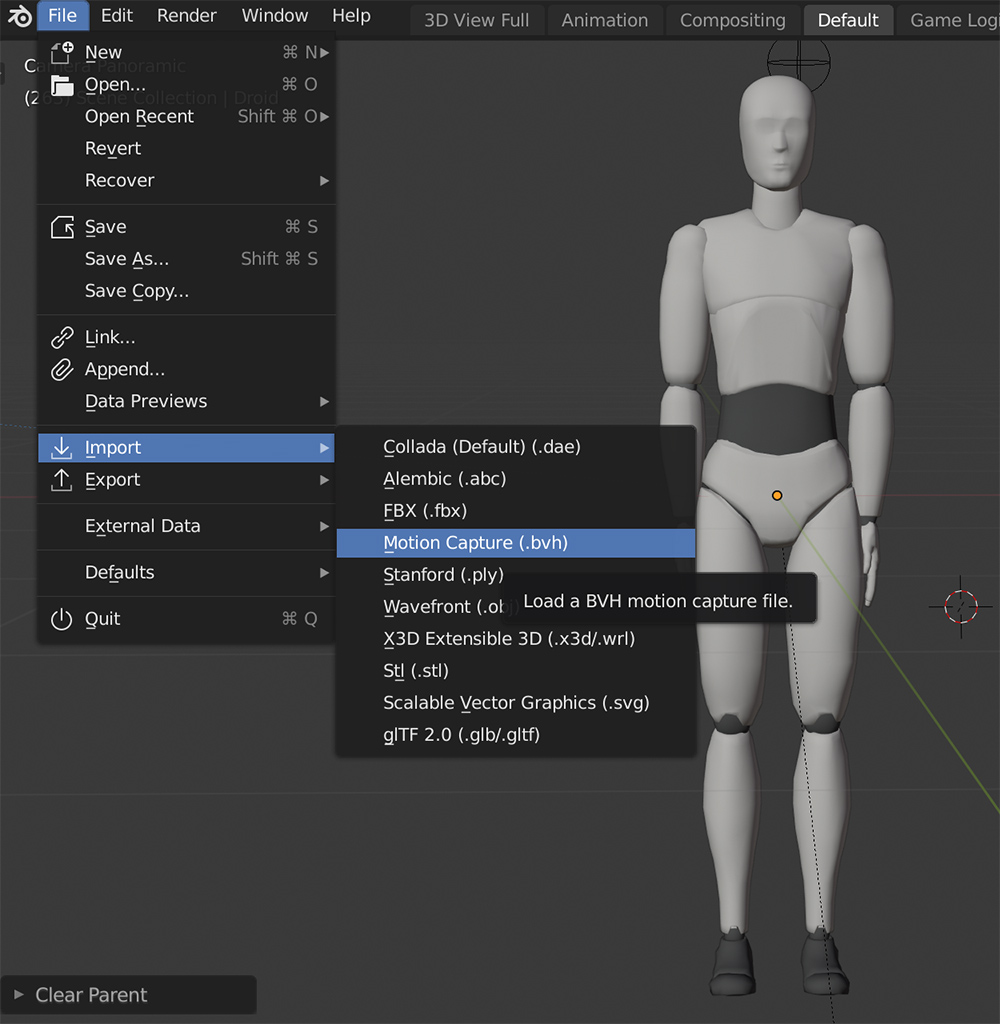
Import your .bvh by clicking File - Import, and Motion Capture (.bvh)
The highlighted skeleton is your motion file and now it is still separated from the model:

Step 4. Parent the skeletal motion file to the 3D model
It’s called “parenting” when you merge the motion file with the 3D model. First, select the 3D model, and as while holding the shift (in MAC), select the .bvh motion file, then right-click on the scene > Parent > With Empty Groups.
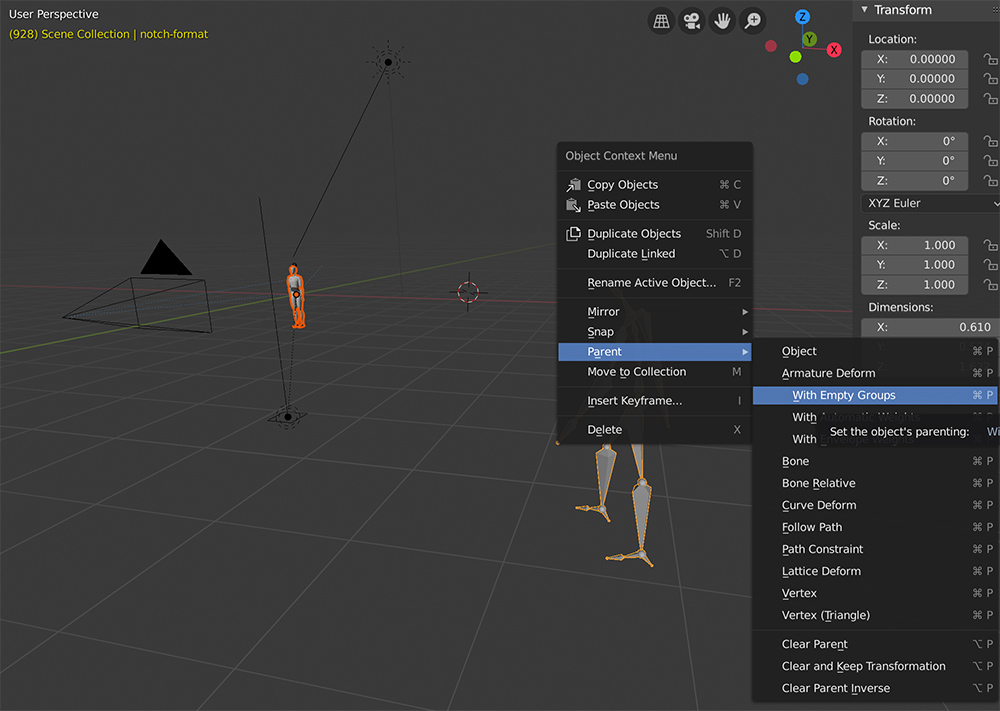
If you move the cursor on the timeline, you can now see the 3D avatar moving:
Step 5. Setup the Camera
The scene’s Camera object defines the rendering frame of the image or video:

This is how you can toggle the camera-view:

Blender offers a wide range of manipulators to set up your camera throughout the animation.
In this tutorial we will present a simple camera motion that will 1) follow the location of the avatar, 2) will face towards a select body part of the avatar.
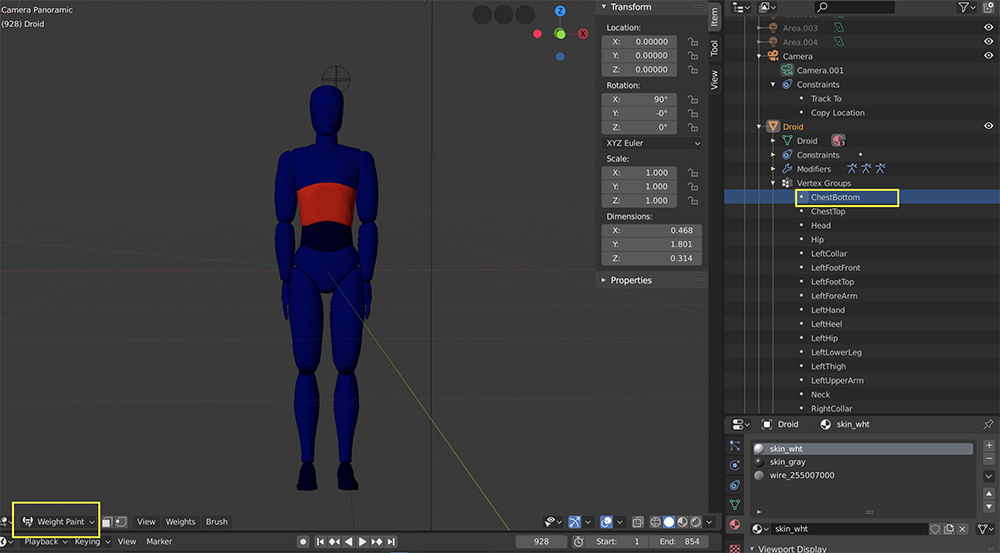
Select the Camera. On the bottom right window, tap the Object Constraint window. Add the following two constraints to the Camera:
- Track To. Your target is the “Droid”, and choose the Vertex Group “ChestTop”. (So you will be looking at the avatar shoulder-level.
- Copy Location - Again, your target is the “Droid” Droid, this time choose the Vertec Group “Hip”. We choose an Influence 0.8 - so the camera motion looks more natural than following the motion one-to-one. You may want to experiment with different settings.

We recommend you search for existing literature/tutorials to help you set up the desired camera motion.
Step 5. Render the animation
Blender allows you to export the animation frame-by-frame which you will be able to add to any video editor software.
Rendering Engine. Blender offers various engines. If you are unfamiliar, we recommend you use the system default for now (Eevee).
Background color / transparency. You can choose to set a background color or leave the background transparent. RGBA format. Follow this Tutorial to render your background transparent.
Frame/quality settings You will have to experiment with what quality suits your project. You can always render in high quality, but it may take hours or days to complete a fairly short animation, resulting in super large files. For a youtube / online video the following rendering settings work well:
- Scene Dimensions > resoltuion: 1920x1080px
- Scene Dimensions > output: Compression: 50%
